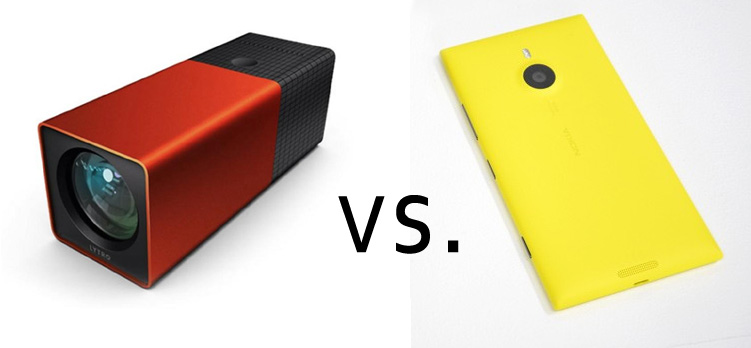
Lytro Hack: How to extract data and jpg files from the .LFP file format using lfpsplitter
") While Lytro’s desktop software is nice and easy to use, you may want to have a deeper look into the LightField Pictures you’ve created with your own Lytro LightField camera.
While Lytro’s desktop software is nice and easy to use, you may want to have a deeper look into the LightField Pictures you’ve created with your own Lytro LightField camera.
The first person to reverse-engineer the Lytro .LFP File Format and make the results available, was Nirmal Patel.
He also gives insight into the .LFP file format:
The file itself is formatted as follows. First, a header:
# magic 12 byte header (LFP)
89 4C 46 50 0D 0A 1A 0A 00 00 00 01
# 4 byte length (0, since there is nothing in this section)
00 00 00 00After this are a number of sections.
The data in the first is plain text
JSON table of contents describing what the rest of the sections in the file
contain. The remaining sections can be additional metadata, a depth lookup
table, compressed jpg images, or raw sensor data depending on the file.
Patel created a commandline tool called lfpsplitter, which can extract the following data from .lfp and -stk.lfp files into individual files:
- metadata
- depth lookup table (plain-text list)
- raw camera picture (.lfp)
- component jpgs at different focal depths (-stk.lfp)
The source code of lfpsplitter is available in the lfptools project on GitHub.
How to compile lfptools:
You can compile the source code easily in cygwin (install it following this tutorial; make sure “gcc”, “gdb” and “make” are included. In the package selection process, click “View” in the top right, enter the names into the search field and click the rotating arrows until “bin” has an X):
- Download the lfptools files and copy them to c:\cygwin\home\<username>.
- Start cygwin and enter the following lines:
gcc -O3 -Wall -c -o lfpsplitter.o lfpsplitter.c
gcc -o lfpsplitter lfpsplitter.o -O3 -Wall
(Important: They’re capital o’s, not zeros!) - When compiled successfully, you’ll find a new file named lfpsplitter.exe in that same directory.

How to use lfptools in Windows:
- Copy your compiled executable file to any location you like (in this example, we’ll use c:/lytro/)
- Go to C:\cygwin\bin and copy cygwin1.dll to that same location
- Add some LightField picture files (.lfp and -stk.lfp; they’re stored in C:\Users\<username>\AppData\Local\Lytro\images)
- Start your Windows console (Win XP: Start – Run – cmd; Win7: Start, enter “cmd”, press Enter).
- Go to the desired directory (e.g. “cd c:/lytro/”) and call it like this, depending on whether you’d like to extract raw data or just get the JPGs:
lfpsplitter IMG_0001.lfp
lfpsplitter IMG_0001-stk.lfp - lfptools will output metadata, depth lookup tables, and (1) the raw image file (when extracting from the full .lfp file) or (2) the different focal depth layers as JPGs (when extracting from a -stk.lfp file).


The raw image file (IMG_0001_imageRef0.raw) can be converted to a black-and-white tif-file using the raw2tiff command, according to Patel’s article:
raw2tiff -w 3280 -l 3280 -d shortt IMG_0004_imageRef0.raw output.tif
Let me know how this works for you!


Thanks for sharing the hack, but the my compiled executable does not seem to work with any lpf file. I get a “Failed to open file xyz”. I compiled the c file using Cygwin on Windows 7 Pro 64 bit. I tried different lfp files: stk and raw, downloaded from the forum and taken with my Lytro. Any idea what the issue could be? Cheers, Michael
I have the same problem. I am working on Win Vista 64 bits.
OOPs, solved :-p
Thanks for the article…
I don’t have a Lytro camera but thinking about getting one.. what I’m interested in is the depth information.
Does the look up table give you any indication of the depth resolution, or the maximum distance away that it can handle? (eg is anything after 15m away just given a max value)…
Many thanks,
Phil
Hi Phil,
from experience, i’d say that it’s impossible to get any refocus effect (which is based on the depth data) between objects that are about 1.5+ meters from the lens, in Everyday Mode.
Creative Mode allows you to capture more depth, but on a limited range of distances (e.g. refocus between 3-5 meters in one situation, but you can’t refocus on objects closer or farther away).
Worked for me – thanks.
(the version of the camera and software I am working with called the image files something different e.g. stacklq.lfp instead of img-stk.lfp and stored them in the lytrolibrary in pictures but after that everything was the same)
I am off to search but any info on how the stack of images are organized would be useful – looks like different focal planes and then different viewpoints?
Hi, how was it that you were able to import these stacklq.lfp files? I’ve been trying with the img-stk.lfp and they aren’t opening for me.
This was before Lytro updated the file format to improve data compression (I believe around Desktop version 4.0). As far as I know, lfpsplitter never made the upgrade.
I know it’s not likely but I was wondering if you know of any way to use lfpsplitter or anything like that with the recent lytro desktop? It’d be much appreciated.
For me the lfp splitter works with the illum files. Only the RAW imagefile is messed up. Koala have you found an alternative yet?
Where are the illum sample lap raw files?
I want to play with them in the lytro desktop software package to be able to make a buy discussion on the ileum.
Hi Tycho,
we don’t have Illum raw files, as the camera has not been released yet.
Hi, I could not install Cygwin for windows 7 64 bit. the link for cygwin installation tutorial dose not work.
Hi Pey,
a Google search reveals many tutorials on how to install cygwin, e.g. https://www.cygwin.com/install.html or http://www.dogsbodynet.com/openr/install_cygwin.html.
Can someone send me a dropbox link of there lfpsplitter.exe it says there is no file input. That it wont compile. Please, I have a limited amount of time. Nothing is working according to the tutorial, I did everything right checked 3 times, but no results.
Hi James,
here’s a compiled 64-bit version:
https://www.dropbox.com/sh/hul3tijj2pp8lb3/AAAcn0QH-bee5qTZx-mdLDSXa?dl=0
There’s a good chance that this won’t work for your system, but go ahead and try it.
the lfpsplitter works fine but converting the raw file into tiff via raw2tiff does not work for me. It says that the command is unknown…
if on debian or ubuntu: apt-get install libtiff-tools
Hi. Thanks for the post. It is very useful.
Does it also works for the new Lytro Illum camera?
Thanks you.
Hi I’m having trouble to obtain a good raw image. Every time that I run the lfpsplitter it returns an image full of noise. Can someone please help me? Thanks
Hi. I’m having trouble to convert RAW to TIFF. Raw2tiff command returns “Input file too small”. I’m using Lytro Illum. Does anyone have this issue?