LightField Software to Process your DIY LightField pictures (Part 1)
So you’ve built your own LightField Camera? Taken your first LightField pictures? What’s next?
The next step is finding software that will allow you to process the captured LightField information. There are countless factors in which LightField setups can differ, so unfortunately processing your pictures is not just a matter of click and refocus. There is some software available, though, that will help you work with your very own LightField photographs.
Part one of our feature on “LightField Software” will focus (pun intended) on tools made public by the Stanford Computer Graphics Lab.
LFDisplay – Real-Time LightField Viewer
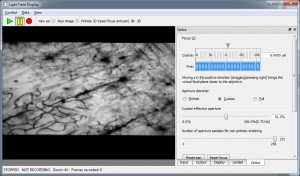 Originally developed for , LFDisplay will also work with LightField pictures taken with other setups (including a DIY LightField camera). The Open-Source tool for Mac and Windows provides the following LightField features…
- software refocus: two refocus sliders (coarse and fine) for adjustment along the virtual z-axis
- synthetic aperture controls: pinhole, full and custom aperture
- virtual [tag]3D tilting via click & drag
When opening sample LightFields, don’t forget to also load the configuration details for lenslets and optics.
The supplied documentation provides detailed information for calibration and usage of the programme. An added extra is the manual on how to set up a LightField microscope, but other LightField pictures work with the software as well!
Aperture – Flash-based LightField Viewer
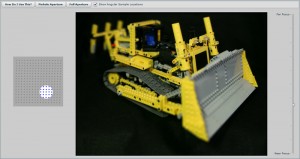 Using the flash-based LightField Viewer “Aperture” by Andrew Adams, you can explore your processed LightField data interactively in the browser of your choice, and present it to others on the web. Aperture allows you to…
- click to refocus: click anywhere in the image. only works if a depth map is available.
- slide through the refocus range: use the slider on the right
- change the size of the virtual/synthetic aperture: shift+click inside the grey square on the left; the white circle represents the size of the aperture. using the top buttons, you can also choose minimum (“pinhole aperture”) and maximum (“full aperture”) aperture.
- change the point of view (cf. Perspective Shift): with a smaller than full aperture, click and drag the white circle inside around inside the grey square.
You can play around with some sample LightFields on the Stanford LightField Archive.
Detailled information is also available on how to create your own LightField dataset. You’ll need JPG files of your subaperture views, an xml file that contains the u and v coordinates, and (optionally) a depth map.
The following two software packages are probably less interesting for end users, and potentially more interesting to programmers and tech-geeks, as they open up the technical side of LightField basics.
Findgrid – Automatic Calibration Grid Detector
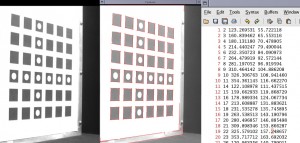 Findgrid (the Stanford Calibration Grid Detector) is a software tool developed by Vaibhav Vaish that automatically detects a calibration grid in a camera image.
Just print the supplied calibration grid, take a picture with your LightField camera, and findgrid will identify the sub-pixel coordinates of image features, such as the corners of the calibration grid. In the provided 6 x 6 grid, findgrid will find 6 x 6 x 4 = 144 corners.
The linux binary executable of findgrid is available here for download.
LightPack – LightField Authoring and Rendering Package
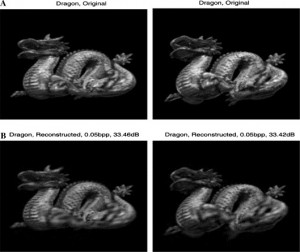 Dating back to 1996, LightPack is a collection of software tools, which contains…
- lifview: an interactive LightField Viewer that preceded Aperture
- lifauth: an authoring kit that helps you create your own LightField from an array of images
- lifsource: source code of the above tools
- lifs: pre-computed sample LightFields
Due to its age, LightPack was designed for SGI (Irix 5.0 or higher) and Windows 95. We weren’t able to run it in Windows 7 (64 bit), even using Windows 95 compatibility mode. If you know how to run the software with current operating systems, please let us know!



2 Responses